To create a load path from the foundation up through to the house, the gaps between the foundation and the mudsill must be filled with concrete. When concrete is added to the top of a foundation it is sometimes called foundation capping. The general strategy is to create forms on either side of the gap. On one side only, the form will have a one-inch gap at the top to allow concrete to be stuffed in. Does this make things more difficult? Yes, but it beats removing the mudsill to pour from the top.
Before building each form, I carefully attached some self-adhesive flashing tape to the underside of the sill. This functions as a kind of damp-proof barrier so that the mudsill doesn’t draw moisture from the concrete. Making each form takes about a day though some are more complex than others. I’m using 3/8” plywood as the face and 2×4 lumber to reinforce it. The form is secured with steel form wire that has been doubled over and wrapped once around the 17-inch bolts that I have epoxied into the foundation. To tighten the wire, the screwdriver is alternately pulled hard and twisted until tight. One must be careful; since you need to know when to stop tightening. Once the slack is taken up and the wire is just a bit too tight and the wire will snap. After both sides are wired to the bolts, I use some wood scraps to stabilize the form vertically. On my first attempt, I failed to reinforce the mudsill from deflecting vertically and the sill ended up slightly bowed after stuffing with concrete. The day before the concrete is poured the existing concrete should be thoroughly wetted. Old dry concrete will suck moisture from the new concrete at the interface and make it weaker.
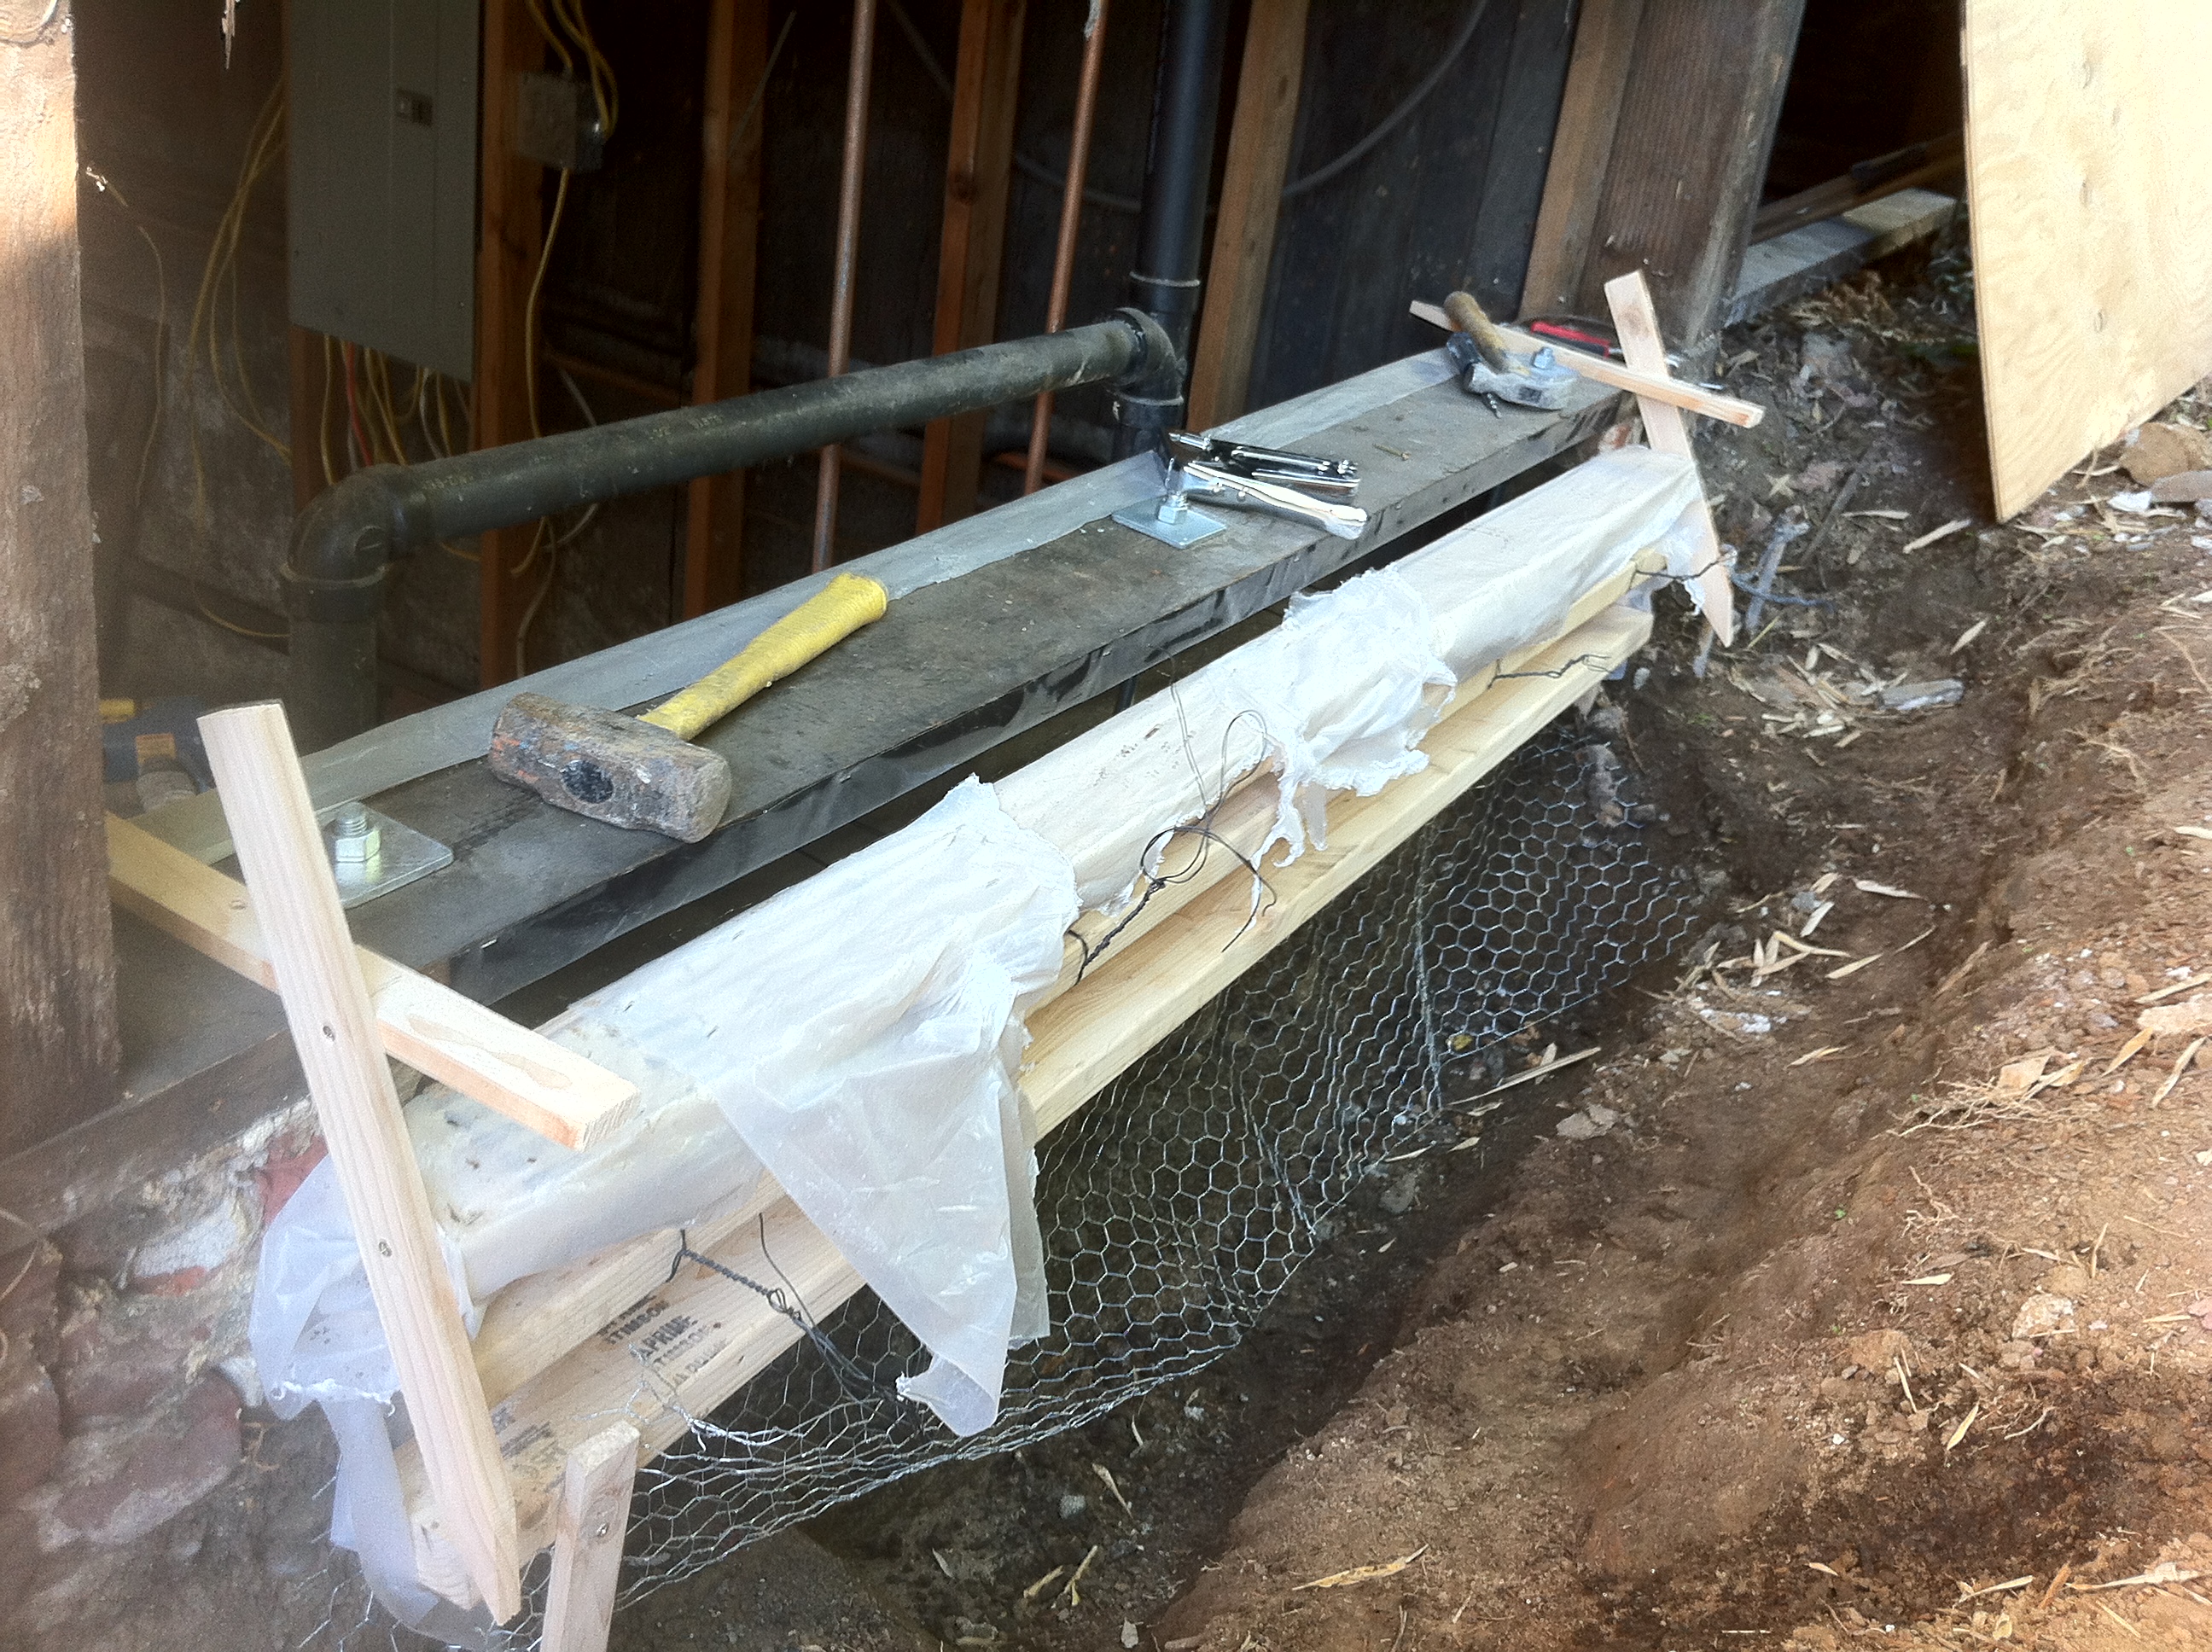
One concrete capping form. The plastic sticking out is to keep the concrete from sticking to the form. The chicken wire below is to repair some of the wall below.
After a week, the steel wire is snipped and the forms are removed. If the concrete surface is imperfect it can be filled in later with topping mix. As the concrete sets it shrinks a bit so I made sure to tighten the bolts again. The city plan calls for the bolts to be tight enough such that the square washer just starts to dent the wood of the sill.

The completed concrete on the west side of the house looks really great. The south side is now complete as well. Both still need to be coated with topping mix and then painted to make them perfect.
